Thursday, September 30, 2010

Teapot Vegetarian House - Redmond

About two months ago, I wrote a post about the Teapot Vegetarian House in the Capitol Hill area. This time, I went to their Redmond location with seven of my non-vegan friends for dinner. One of my friends organizes a 'Diners Club' once a month, where the idea is to go check out different restaurant together. It is a great way to try a new restaurant, because we usually share a meal 'family-style' which enables us to eat a variety of foods, then one of us would write an overall review on behalf of everyone. A friend of mine wrote a review this time, and she can probably give you a less biased opinion about vegan dishes than I could since she's not a vegan, and she is an excellent writer. I took bunch of pictures for you to enjoy...

 Bo Bo Platter

"Beef" Fried Rice

Mushroom Yaki Udon
 
Roasted Tofu Soup Noodle
 
String Beans in Hot Garlic Sauce
 
"Cheese"cake

We also ordered Sizzling Rice Soup, Spring Rolls, and Fried Wide Noodles in Dark Sauce though I don't have the pictures to prove it... I like their Sizzling Rice Soup, but I think they gave it to me in a bigger bowl at the other location. I was really anxious to try their "Cheese"cake after reading bunch of good reviews... I actually liked it more than regular cheesecake. Even before becoming a vegan (not quite yet), I could only have a bite or two of regular cheesecake, it was too sweet and rich for me. Anyways, here's my friend's review. Enjoy! 

"Teapot Vegetarian House is actually a vegan restaurant, and a good choice for lunch or dinner in the Redmond, WA area.

Teapot is located in a strip mall near Microsoft, convenient to shopping, although the off-street parking is in a lot with an approximately 30-degree grade, which could be a challenge to disabled patrons. From the outside, the restaurant appears smaller than it really is. Inside is pleasantly generic Asian décor, Tables are sturdy, and the floor plan seems well thought out as well as flexible enough to comfortably accommodate our party of 8. Bathrooms were clean-ish and accessible to the disabled, although we did spot a dead cricket in one.
 
We had a range of diners, from vegan to unadventurous to an adventurous hot chili lover. The menu is varied, and everyone found something that suited them. One of our diners ordered beer, and there is a decent variety of beer and wine to be consumed with dinner for those who prefer that.
 
Note that several dishes at Teapot contain a protein source designated by the name in quotes of the meat it most tastes like, for example, “Chicken” fingers.
 
We started off with the BoBo platter, which was a combination plate of all the available appetizers—“chicken” fingers, satay, spring rolls, fried wonton dumplings, tofu fritters and tofu rolls. Everyone seemed to like these, except one diner who found the fried wontons to be overly greasy.
 
We then enjoyed a shared family-style meal of deluxe fried rice with “beef”, sizzling rice soup, mushroom yaki udon, roasted tofu soup noodle, string beans in hot garlic sauce, and fried wide noodles in dark sauce. The last two were the favorites—the slight heat of the garlic sauce on the string beans was appreciated, and the wide noodles were cooked to the perfect point. We also were pleased by the mysterious non-descript name ‘dark’ sauce. The “chicken” was better than the “beef”, but both were good, and neither was necessary to the taste of the dish—probably just thrown in to placate carnivores.
 
Overall, our hot chili lover found several of the dishes to be slightly too heavy on salt, and too light on spice. Our unadventurous eater skipped the family-style hodgepodge and stuck contentedly to a personal order of spring rolls.

For dessert, we all shared bites of a single large slice of tofu cheesecake decorated with mango sauce and blueberries. The ‘cheesecake’ was savory with a tofu-esque aftertaste; a suitable very nice dessert that I’d order again, but not American cheesecake.
The bill for all of this food was very reasonable, and I’ve chosen not to discuss our (mis)handling of the payment process, other than to say it was hilarious. "
Location: 15230 NE 24th St. Redmond, WA 98052 
Hours: Hours: 11:00am-10:30pm (Daily)

Wednesday, September 29, 2010

Edamame Hummus - Vegan

Yesterday, I posted a recipe for 'Garliciest Garlic Hummus', but I understand that not everyone is a garlic junkie like me... Here's another hummus recipe for you! This one has a much milder flavor and beautiful light green color.

'Edamame' is the Japanese word for soybean. If you are trying to get more soy protein in your diet, eating unprocessed soybean is a much healthier way than buying processed soy products. You can buy frozen edamame with or without shells at Trader Joe's, while fresh ones are also available at oriental grocery stores. You can just boil them and sprinkle a little bit of salt for a snack/appetizer. It's not only delicious and healthy, but also fun to pop edamame beans out of the shells into your mouth!


What goes in your body (vegan):
  • 2 garlic cloves
  • 1/2 cup Italian parsley
  • 1 1/2 cups frozen shelled edamame
  • 4 tsp extra virgin olive oil
  • 1 tsp salt
  • 1/2 tsp ground cumin
  • 1/4 tsp ground coriander
  • 2 tbsp tahini
  • 1/4 cup water
  • 3 tbsp fresh lemon juice
  • paprika to garnish

You are going to:
  1. Cook edamame according to the package instructions. (Boil 5-10 minutes.)


  2. Chop garlic and parsley in a food processor until very finely chopped.
  3. Add remaining ingredients except for 2 tsp olive oil and paprika and process until smooth. 
  4. Spoon hummus into a serving bowl. Drizzle with 2 tsp olive oil and sprinkle with paprika, and serve with fresh vegetables, crackers or pita bread.
Secrets from the chef:
  • You may want to serve with herb or salt crackers since this is very mild flavored hummus. I don't recommend serving along with yesterday's 'Garliciest Garlic Hummus'... (The delicate flavor will be completely overwhelmed by garlic... I'm speaking from experience here.)
Bon appétit! 

Tuesday, September 28, 2010

Garliciest Garlic Hummus - Vegan

Disclaimer: You should not try this recipe if you are 'Twilight' fan... It will scare your handsome vampire right out of his pale white skin...!


What goes in your body (vegan):

  • 2 cups garbanzo beans 
  • 1/2 cup tahini (sesame paste)
  • 1/4 ~ 1/2 cup extra virgin olive oil
  • 1 bulb of garlic, peeled
  • 1 lemon
  • Paprika & cilantro to garnish (optional) 
You are going to:
  1. Mix garlic and 1/4 cup of olive oil in a food processor until the mixture is smooth. 
  2. Add garbanzo beans, tahini and freshly squeezed lemon juice to the mixture and process until smooth. (If the mixture seems too thick, add some more olive oil)
  3. Let it sit in the refrigerator for 24 hours before serving.
  4. Garnish with paprika and cilantro, and serve with fresh vegetables, crackers or pita bread.
Secrets from the chef:
  • Letting it sit in the refrigerator for 24 hours brings out more flavor from the garlic and takes the edge off of spiciness from fresh garlic . If you have to serve immediately, use only 1/2 bulb of garlic or roasted garlic instead.
  • Avoid eating this before going out to see someone ;)
  • If you don't own a food processor, buy Trader Joe's Garlic Hummus Dip. It's delicious, though it's not as garlicy as this one.

Bon appétit! 

Monday, September 27, 2010

Crispy Napa Cabbage Salad - Vegan

After a pretty good experience from my first order, I decided to continue on the 'Farm To You', organic produce delivery service by Full Circle Farm, at least for now. This week's order contained a head of napa cabbage. I don't think it's really a staple vegetable here in the U.S., but I grew up eating it all the time in Japan. My mom used to cook them in a hotpot or soup and she also made a pickled cabbage with it too. But I had a hunch that my husband wouldn't like any of those. After getting some ideas from online recipes, I decided to make a salad because I realized that I never had a raw napa cabbage. I went Asian-style in honor of this Asian vegetable.


What goes in your body (4 vegan servings):

  • 1 head napa cabbage
  • 1 bunch green onion
  • 1/4 cup cider vinegar
  • 1/4 cup vegetable oil
  • 1/4 cup sesame oil
  • 1/2 cup white suger
  • 2 tbsp soy sauce
  • 1 package of crispy chow mein
  • 2 tbsp sesame seeds
  •  1 cup silvered almonds

You are going to:
  1. In a small saucepan, heat vinegar, vegetable oil, sesame oil, sugar, and soy sauce. Bring the mixture to a boil, let boil for 1 minute. Remove the pan from heat and let cool. 
  2. Thinly slice (or shred) napa cabbage and green onion. 
  3. Combine vegetables, sesame seeds, almonds and chow mein in a large bowl.
  4. Pour the dressing into vegetable mix and serve immediately.

Secrets from the chef:
  • Crunchy chow mein can be found at the oriental food section in a regular grocery store. If you can't find them, break ramen noodles into smaller pieces as a substitute.
  • Dressing doesn't have to be cold, but not hot. It actually seasons the vegetable better if it's still a little warm. 
  • Serve right away or the crunchies will get soggy.

Bon appétit!

Sunday, September 26, 2010

Garlic Fries - Trader Joe's

The baseball season is almost over. Do I  really care? Not really. But I do go to see a Seattle Mariners game once or twice every year at Safeco Field. The best part is, I have to say, the garlic fries! I don't know if garlic fries are common in other stadiums, but definitely popular at Safeco Field. Thank you, Trader Joe's for making frozen garlic fries!

All you have to do is to stick them in the oven for about 20 minutes and mix with thawed garlic sauce.


One bag will make a light meal for 2 people or enough side dish for 3-4 people. My mouth is watering just looking at this picture!

Saturday, September 25, 2010

Black Bean and Corn Salad - Vegan

This is an inexpensive, yet delicious and filling salad. It's perfect for nights that you don't want to turn on the oven or stove. It also makes a great side dish and is well-suited for a potluck dinner. (What more can you ask from one recipe?)


What goes in your body (vegan):
  • 2 cups black beans, drained
  • 2 cups corn, drained
  • 6 tbsp fresh lime juice
  • 5 tbsp extra virgin olive oil
  • 1/4 cup red onion, minced
  • 1/4 cup scallions, minced
  • 1/4 cilantro, minced
  • 2 tsp cumin
  • salt & pepper
  • 1/2 cup fresh tomatoes, chopped
You are going to:
  1. Mix all ingredients, except the tomatoes, together.
  2. Add salt and pepper to taste. Cover and chill.
  3. Shortly before serving, toss in the tomatoes.

Secrets from the chef:
  • This salad can be prepared the night before. The flavor get blended better as you leave it in the refrigerator over night. Don't forget to toss in the tomatoes just shortly before serving.
  •  You can turn it into a satisfying, healthy, main dish by adding some cooked small pasta such as orzo or couscous, or whole grain such as quinoa or wild rice.
Bon appétit! 

Friday, September 24, 2010

Where do you get your calcium?

Now that we have a long-term house guest living with us, we have some dairy products in our refrigerator. (I have no intention of forcing him to go vegan, although he eats mostly vegan food when he dines with us.) To my surprise, I haven't been tempted to eat/drink them. But my husband made a comment last night as he pours a glass of milk for himself, "I need to get my calcium."

Oh yes, that wonderful calcium is needed for stronger bones. But have you noticed how dairy consumption has been encouraged by our government? (You see it come with your kids school lunch.) Did you also know that the 11 person panel that drew up the Dietary Guidelines for Americans 2000 included six members with financial ties to the dairy, meat and egg industries?

Here's some interesting facts/studies regarding calcium.
  • Researchers at Pennsylvania State University found that, in girls in their peak bone-building years (ages 12-18), getting extra calcium made no difference at all in bone growth.
  • Harvard reserchers found that, in a 12-year study of nearly 78.000 women, dairy calcium didn't help bone strength at all. Those who got the most calcium from a dairy source actually had nearly double the hip fracture rates, compared to those who got little or no dairy calcium. 
  • Osteoporosis is not a condition of inadequate calcium intake, for the most part. Rather, it is a condition of overly rapid calcium loss. Countries like Japan, China, and parts of Africa where dairy products are not traditionally used, bone breaks caused by osteoporosis are actually much more rare than in the U.S. and Europe.
Also, dairy consumption has been linked to cancer cell growth, asthma, allergies, rheumatoid arthritis, migraine headaches, diabetes, hormone imbalance and heart disease. (You can read more in 'Breaking the Food Seduction' and 'The Kind Diet'. Both are on my recommended book list.)

Okay, but we still need calcium, right? "Where do I get my calcium?" Check this out! This list tells you how many milligrams of calcium you can get from a 100-gram serving.
  • Butter -20mg
  • Whole milk - 118mg
  • Chickpeas - 150mg
  • Collard greens - 203mg
  • Parsley - 203mg
  • Soybeans - 226mg
  • Almonds - 234mg
  • Sesame seeds - 1160mg
  • Hijiki sea vegetable - 1400mg
I eat at least 1-2 things from this list everyday. Where do I get my calcium? The same place where I get my protein. From everything I eat!

Thursday, September 23, 2010

Going a little greener these days

This was totally unexpected... Going to a nearly-vegan diet somehow has inspired me to be a little greener these days. I blame it on all the interesting books and resources that I've been reading lately about the vegan diet. But it totally makes sense. If I care about what I eat, I should also care about how the food I eat has been made. If I care about what goes into my body, I should also care about the environment where all my food comes from. It's logical, right?

I'm not going to preach about how the farm animals have been mistreated here. Only if you are ready to be informed, you can check out the websites like 'Meat.org - The Website the Meat Industry Doesn't Want You to See' and 'PETA's Vegetarian Starter Kit'. The information is not for the faint of heart. (I personally couldn't stomach it...)

I've been always interested in the idea of reducing waste and recycling more. It's just how I was raised in Japan. I don't like being wasteful... we call it "mottai-nai" in Japanese. Because living spaces are smaller there, people tend not to own more than they need. We have detailed guidelines in place on how you should separate your recyclable items for the public garbage service to collect. After living in America over 10 years, I got used to the idea of having more space and more stuff. I have a big garbage bin which gets collected every week... Who cares how much trash I produce, it's a big country, right?

In my post - '13 Unexpected benefits of this new diet' I wrote about 2 weeks ago, I mentioned as point #12 how my garbage doesn't have a rotten smell anymore. All of that awful smell was coming from meat and it's packages. (Well, we don't have stinky diapers to deal with in our house.) I remember having to take out my kitchen trash every 1-2 days, so that the house doesn't smell funny. But now I don't have any meat related junk in my trash, I only have to take out my kitchen trash once a week or even less. This got me thinking, hmmm.... I can start collecting food scraps for composting! Well, unfortunately I don't have a yard big enough to have a space for making my own compost, so I decided to recycle instead.

In King County, where I live, we can place all our food scraps (and even empty pizza boxes!) into our yard waste bin. Everything in the yard waste get recycled into compost. This reduces the amount of garbage and also our usage of the garbage disposal down to our water/sewer system. I've known about it a long time but I was hesitant to participate because I was afraid of the awful smell from my food-related garbage before. But finally, I was ready to make a change and I bought a small waste basket and biodegradable bags for food bags.


The initial investment was about $15. I know those biodegradable trash bags are more expensive compared to regular plastic trash bags... It's around $5 for 25 of 3 gallon bags and I think it totally worth it. For starters, you can check with the city or county's waste division to see if they give free samples. For example, King County residents can request a free BioBag sample from the county's website.

I chose the BioBag system because both their waste baskets and biodegradable bags are breathable, which means less bacterial odor. Notice how you can see through the waste basket? It's a little counter-intuitive. I would think I need tight closed trash bin to keep the smell trapped inside, but the opposite is true. The food waste creates heat and moisture that can not escape when placed in closed containers, which creates more bacterial odor inside. Also you can use this breathable bag to store refrigerated fruits and vegetables. It allows moisture to evaporate through and keeps fruits and vegetables fresher longer.
 

I normally keep it out of sight, under my kitchen sink, and bring it to the counter top whenever I cook and clean after the meal. It's convenient to have a small waste basket right where I prepare all my ingredients for meals. It's not a bad looking thing, but I personally don't think it's nice enough to leave it on my counter top.

I know it's a very small change, but it's still a change in the right direction and I'm proud of myself for doing it! What are you willing to do today, for better tomorrow?

Wednesday, September 22, 2010

Asian Avocado Aioli - Vegan

Okay, here we go. You get my confession... I ate three chicken nuggets, a bite of Ethiopian lamb dish, and probably something else at the party last weekend. They were good but I've been paying the price ever since... I'm getting better now but my entire last week was ruined. My energy level was super low and I couldn't focus. I spoke with my voodoo doctor ( = my naturopath doctor) today and she told me that it can take up to two weeks for the body to be clean from the wrong food. (Sigh...) They were good. Was it worth it? Absolutely not!! So here I am, lagging behind everything from last week because I didn't get as much done last week. But I still want to keep my promise I made to myself when I started this blog - "One Post Everyday". This is going to be a very short post, the recipe is excellent nonetheless.


What goes in your body (vegan):
  • 1 avocado
  • 2 tbsp rice vinegar
  • 1 inch ginger, grated
  • Salt

You are going to:
  1. Mix all the ingredients!

Secrets from the chef:
  • Make it fresh right before serving so that avocado keeps its fresh color.
  • It goes really well with fish (if you are not a vegan.)
Bon appétit!

Tuesday, September 21, 2010

Polenta with Stewed Peppers and Tomatoes - Vegan

The bright colors of the peppers and tomatoes make this dish delicious-to-your-eyes and perfect for entertaining your guests.


What goes in your body (4 vegan servings ) :
  • 3 cups water
  • 1 cup polenta (coarse-ground yellow cornmeal)
  • 3 tbsp extra virgin olive oil
  • 3 cloves garlic, finely chopped
  • Salt, to taste
  • 1 medium onion, thinly sliced
  • 1 large red bell pepper, cut lengthwise into thin strips
  • 1 large yellow bell pepper, cut lengthwise into thin strips
  • 1 pound fresh plum tomatoes, coarsely chopped
  • 1/4 tsp dried oregano
  • Freshly ground peppers, to taste
  • 1/2 tsp red wine vinegar
  • 1/2 tsp sugar
  • 2 tbsp finely chopped fresh flat-leaf parsley, to garnish
  • Pitted kalamata olives

You are going to:
  1. Lightly oil a 10 inch pie plate, then set aside.
  2. In a medium saucepan, bring the water to boil over high heat. Slowly add the polenta, stirring constantly with a long-handled spoon. Reduce the heat to low and stir in 1 tbsp of the oil, one third of the chopped garlic, and salt. Cover and cook, stirring occasionally, until the corn particles are tender, about 15 minutes. Remove from the heat and let stand covered for 5 minutes.
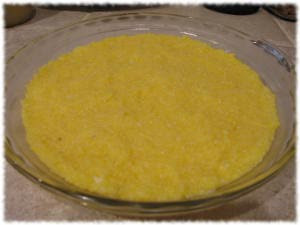
  3. Spoon the polenta into the prepared pie plate, pressing down with the back of a large spoon to form a smooth surface. Let stand for 20 minutes to become firm. (Cover with foil and keep it warm.)


  4. Meanwhile, in a medium pan, heat the remaining oil over medium heat. Add the onion and cook stirring often, until softened but not browned. 
  5. Add the bell peppers and remaining garlic, cook stirring often, until the peppers are softened but still somewhat firm.
  6. Add the tomatoes, oregano, salt and pepper. Bring to a boil over medium-high heat. Reduce the heat to medium-low, cover, and simmer for 20 minutes, stirring occasionally.
  7. Add the vinegar and sugar, stirring well to combine. Cook uncovered, stirring occasionally until the mixture is slightly thickened, about 5 minutes.
  8. Spoon the tomato mixture on top of the firm polenta and garnish with parsley.

  9. Cut into wedges and serve with greens and olives.
 Secrets from the chef:
  • It may seem like a lot of work when reading the recipe, but fear not! It's actually quite simple to make.
  • I recommend serving with a lot of olives to add more flavor to the meal. Go splurge on good olives from a fresh olive bar! 
  • The original recipe can be found in The Mediterranean Vegan Kitchen. (One of my recommended books on the list.) 
Bon appétit!

Monday, September 20, 2010

Coconut Bliss Ice Cream - Vegan

This is my absolute number one favorite vegan ice cream!! Whether you are a vegan or not, you are missing out on some delicious ice cream if you haven't tried Coconut Bliss Ice Cream yet. It's available in Naked Almond Fudge, Pineapple Coconut, Chocolate Peanut Butter, Naked Coconut, Dark Chocolate, Vanilla Island, Mint Galactica, Cappuccino, Cherry Amaretto, Chocolate Hazelnut Fudge flavors. (I wish all the flavors are available at my local store...)

Better yet, coconut is good for you! If you just read the nutritional information on the package, you'll see a quite bit of saturated fat. But behold, saturated fat in coconut oil is different from saturated fat from animal products. It has no cholesterol and contains medium chain fatty acids which can be easily broken down and used for energy. It also has agave syrup as a sweetener, which doesn't cause a sugar rush followed by sugar crash like regular sugar used in regular ice cream.


This picture was taken at the Healthy Living Fair in Issaquah, WA. I got to meet and chat with a really nice gal from the Coconut Bliss tasting team there. She gave me some sample bites, coupons and this fun brochure:


Until I read the brochure, I didn't know that the business was started by a couple in Oregon who are passionate about ice cream and bought a $1.50 hand-cranked ice cream machine at a Goodwill to create some vegan ice cream for themselves. Then they started having tasting parties at their house... and soon the stores wanted to sell them... and here they are!

I really appreciate their commitment to not only to create great taste but also to use the best organic ingredients. Their coconut milk comes from an organic family-owned farm in Thailand, and all their cocoa, chocolate, vanilla and coffee are from certified fair-trade sources.

For more information, you can visit their website, but I say "Tasting is believing", so please give it a try. If you don't like it, I will gladly take any left over ice cream from you!!

Sunday, September 19, 2010

Zesty Coconut Lime Wedding Cookies - Vegan

No, nobody was getting married... but these cookies looked so irresistibly delicious! That's why I like cookbooks (or blogs) with pictures. Those text-only recipes just don't do it for me. (Although they leave a little more room for me to be creative and they don't make me feel the frustration of "Oh no, my dish doesn't look anything like what's in the picture...!") Here's the lovely picture of 'Zesty Coconut Lime Wedding Cookies'. They don't look as pretty as the one from 'The Vegan Cookie Connoisseur' where I found the original recipe, but I'm quite happy with how they look and taste!


What goes in your body (about 2 dozen vegan cookies ) :
  • 1 1/4 cups margarine
  • 1/2 cup powdered sugar
  • 1/2 teaspoon vanilla extract
  • 1/2 teaspoon coconut extract
  • 2 tablespoons lime juice
  • 3/4 teaspoon lime zest
  • 1 1/4 cups cornstarch
  • 1 1/2 cup flour
  • 3/4 cup sweetened flaked coconut
  • 2/3 cup sweetened flaked coconut for rolling and sprinkling

    Lime glaze:
  • 2 tablespoons lime juice
  • 1/2 cup powdered sugar
  • 1/4 teaspoon coconut extract

You are going to:
  1. Preheat oven to 375°F.
  2. Cream the margarine, powdered sugar, vanilla, coconut extract, lime juice, and lime zest in a large bowl until smooth.
  3. Gradually add in the cornstarch and flour, beating after each addition, then stir in the coconut, kneading it in if necessary. (If the dough is crumbling, add a touch more lime juice or a splash of soy milk.)
  4. Roll dough into balls, about 2 tablespoons each.
  5. Pour the coconut into a small bowl, then roll each cookie in the coconut and place on a parchment-lined cookie sheet.
  6. Sprinkle the rest of the coconut on top of the cookies.
  7. Bake cookies for about 15 minutes or until firm and the bottoms are golden brown.
  8. Let sit on cookie tray for at least 10 minutes before moving to a cooling rack or they will crumble when you transfer them.


  9. To make the glaze, combine all ingredients in a small bowl and stir until smooth.
  10. When the cookies are almost completely cooled, dip each one in the glaze and let sit until the glaze dries. (Optional: Sprinkle a bit of green sugar on top of each cookie.)
 Secrets from the chef:
  • I made mine into smaller, pop-in-your-mouth-size rolls since I was bringing them to a party where there were a lot of kids and adults. This would prevent the cookies from crumbling while taking a bite. (The recipe yielded about 40 cookies.)
  • If you are making them larger, please be aware that you are going to need more coconuts flake and lime glaze because the total surface area to cover increases.
  • I used 'nucoa' (no partially hydrogenated soybean oil) instead of margarine. 
Bon appétit!


    Saturday, September 18, 2010

    Herbs - Getting ready for the Winter

    I love living in Seattle, it's such a beautiful place! I actually don't mind the fact that it rains almost everyday and gets really gloomy from October to May. But I know that my herbs and vegetables outdoor would rather live in sunny California... I decided to harvest a bunch of herbs today to start getting ready for the Winter before they go dormant (or die). I harvested two bucket fulls of rosemary, oregano, thyme, chive, and basil.

    Rosemary, oregano and thyme dries well by simply hanging them upside down in a dry cool place. I made small bouquets and hung them inside of my pantry. I have to leave the pantry door open ajar to invite fresh air in, but the whole area smells so nice and fresh! I made many small bouquets instead of bigger ones because they dry faster and it's easy to give them as gifts to my friends.


    Basil and Chives have higher water content and they don't dry well with the same method. The easiest way is to use a dehydrator, but I don't have one. I also read that I can oven-dry them, but I was concerned that they may lose flavor... So I decided to marinate them in olive oil to make flavored oil.


    I chopped them into really, really small pieces. I suppose you can use a food processor to accomplish the same results, but I didn't want them to be grounded up. I also added finely chopped garlic in the mix.


    This makes oil that is perfect for roasting vegetables. All you have to do is toss some vegetables in the oil, sprinkle a little salt, and bake them in the oven.


    I baked onion, french green beans, squash and Brussels sprouts with this flavored oil as a part of the dinner. I was a little afraid that my husband was going to hate me... he's an outspoken Brussels sprouts hater and he really doesn't like squash either... Green beans weren't on his good-list last year, but he has opened up to green beans since I started using fresh french green beans from my garden. He actually liked this side dish!! Or maybe he was trying to be nice to me...?

    I love cooking with fresh herbs! I can't imagine my life without them... I would buy an AeroGarden if I could afford one right now. (or move to sunnier place?)

    Friday, September 17, 2010

    Thai Red Curry with Green Beans and Eggplant - Vegan

    I got this recipe from the 'Vegetarian Times' which is a great resource for recipes and information for a vegetarian lifestyle. Some of their recipes are vegan-friendly as well. The rich flavor of coconut milk is very satisfying, and you don't really miss meat even if you are an omnivore.


    What goes in your body (4 vegan servings ):
    • 2 tbs peanut oil
    • 3 small Japanese eggplant, sliced (about 1 lb.)
    • One 13.5-oz. can light coconut milk (do not shake the can)
    • 3 cloves garlic, minced
    • 1 tbs minced fresh ginger
    • 1 tbs prepared red curry paste
    • 2 tbs dark brown sugar
    • 1 tbs soy sauce
    • 1 thlb thin green beans, trimmed
    • 1 large red onion, cut into 1/2-inch wedges
    • 1/2 cup packed Thai or sweet basil leaves
    • 2 tsp. lime juice
    • Brown rice, cooked

    You are going to:
    1. Heat wok over medium-high heat. Add oil and eggplant, and stir-fry for 3 minutes, or until the eggplant begins to brown. Transfer to plate.
    2. Spoon 3 to 4 tbs of the thick part of coconut cream from top of can into wok. Add garlic, ginger, and curry paste, and stir-fry for 1 minute. 
    3. Stir in remaining coconut milk, brown sugar, and soy sauce. Add green beans, onion, and eggplant; cover, and simmer 8 minutes, or until vegetables are tender. 
    4. Stir in basil and lime juice, then serve with cooked brown rice.  
    Secrets from the chef:
    • I found the original recipe above lacks a little bit of flavor. If you are not a pure vegan, replace the soy sauce with fish sauce; that will enhance the Thai flavor.
    • Or you can try adding peanut butter or peanut sauce to add flavor.
    • Be sure to use Japanese eggplants. They can be a little pricey but it is totally worth the extra money since they are softer and have more flavor. (They are skinny and kinda cute... Ellie the eggplant from my garden wanted to say hi to everyone!)

    Bon appétit!   

        Thursday, September 16, 2010

        nucoa

        Last week's success with 'Giant Bakery Style Double Chocolate Chip Cookies' got me into a baking mood. I found some other recipes from 'The Vegan Cookie Connoisseur' that I would love to try!

        So, I put margarine on my grocery list and went to Fred Mayer yesterday. I grabbed a box of margarine from the shelf and started to read the back of the box just to make sure margarine doesn't have any dairy like I thought it didn't. Of course it doesn't, it's made out of vegetable oil, dummy! But you know what, I'm glad I read the label. Most of the products marked as margarine contain partially hydrogenated soybean oil... Remember that nasty stuff I talked about in my 'An aroma of popcorn...' article? No wonder it is so cheap! One box of margarine was somewhere between $0.79 and $0.99. I guess you get what you pay for, right? I kept checking out other butter-like products for baking and found 'nucoa'. (This is a different product from 'nucoa margarine'.)


        This one says on the box "Non-Hydrogenated", "0g Trans Fat" and "Great for cooking and baking". Sounds perfect! Until I learn that something in it is actually not good for us, this one will be my choice. It was $1.39 per box. It's a little more than margarine, but not too expensive. I don't know how it tastes by itself, but I'm buying it for baking, so it really doesn't matter so much. And the cookies I baked with this came out pretty nice and buttery!

        Wednesday, September 15, 2010

        Tortilla Soup - Vegan

        Here's the recipe I promised yesterday. I usually make this soup whenever I make some Vegetable Broth. It's a money-saver and I love killing two birds with one stone... well figuratively speaking... I will post an original recipe from 'Quick and Easy Vegan Comfort Food', then I will write about how I incorporate the remaining vegetables from yesterday's Vegetable Broth.


        (Sorry about this marginal photo.. I realized I forgot to take a picture half way through dinner. I will update with a better picture next time I make it.. if I remember...)

        What goes in your body (4 vegan servings ):
        • One 6-ounce can tomato paste
        • 1/2 cup plain soy milk or oat milk
        • 3 cups vegetable stock
        • One 14.5-ounce can diced tomatoes with juices
        • 1-2 chipotle peppers in adobo sauce, minced
        • 1/2 cup diced onions
        • 1/2 cup diced celery
        • 1 cup fresh or frozen corn
        • 2 garlic cloves, minced
        • 1/4 tsp chili powder
        • Salt and pepper to taste
        • 1/2 cup cilantro, torn
        • 1/2 avocado, diced
        • Tortilla chips, crushed
        You are going to:
        1. Whisk the tomato paste with the soy milk in a medium stockpot until completely combined.
        2. Add the stock, tomatoes with juice, chipotle peppers, onions, celery, corn, garlic, chili powder, and salt and pepper to taste.
        3. Bring to a boil, lower heat, cover, and simmer for 10 minutes. 
        4. Ladle into serving bowls and garnish with crushed tortilla chips, cilantro and avocado.
        Secrets from the chef:
        • In order to incorporate cooked vegetables from yesterday's Vegetable Broth recipe, replace onions and celery with 2 cups of cooked vegetables.
        • Serve with sour cream for your non-vegan friend. 
        Bon appétit!   

        Tuesday, September 14, 2010

        Vegetable Broth - Vegan

        The weather is getting cooler here in Seattle, and starting to feel like Fall. It makes me a little sad to know that my vegetable garden's growing season is getting close to the end, but it also makes me a little happier since Fall and Winter are great seasons to cook nice&hearty soups. I just made my first batch of vegetable broth for this fall season. Yes, you can buy vegetable broth from the store and it's more convenient, but just like anything else, homemade ones are better and healthier than the store-bought ones.

        What goes in your body (Vegan):
        • 5 tsp extra virgin olive oil
        • 3 small onions (about 1.5 pounds), coarsely chopped
        • 4 small carrots (about 8 ounces), peeled and coarsely chopped
        • 6 celery stalks (about 8 ounces), coarsely chopped
        • 1 garlic head, cloves separated, crushed with the flat side of a knife, and peeled
        • 12 cups water
        • 12 springs flat-leaf parsley
        • 2 tbsp fresh whole thyme leaves (or 2 tsp dried thyme leaves)
        • 2 large bay leaves
        • Salt and pepper to taste
        You are going to:
        1. In a large stockpot, heat the oil over medium-low heat. Add onions, carrots, celery, and garlic, tossing to coat with oil. Cook covered to keep the flavor of the vegetables in the pot, stirring occasionally, until the vegetables have softened, 15-20 minutes.


        2. Add water, parsley, thyme, and bay leaves to the pot. Bring to a boil over high heat. Reduce the heat, cover, and simmer for 2 hours. Remove from heat and adjust the seasoning as necessary. Cover and let the broth rest for 1 hour.

        3. Strain the broth through a fine-meshed strainer into another pot. (Optional: Line the strainer with a cheesecloth and strain the broth again for smoother broth.)
         Secrets from the chef:
        • While straining, press down on the cooked vegetables with the back of a wooden spoon to extract the liquid and get more broth out of them.
        • Set aside the amount you use within a week and freeze the remaining broth. As I mentioned in earlier post, I use empty 'Fleischmann's' containers (measures one cup) to freeze broth for later use. You can also freeze the broth in ice cube trays and pop the frozen cubes into freezer bags for smaller quantities. (Avoid freezing entire batch in one container unless you are going to feed an army.)
        • I save the vegetables (but no herbs) from the stock-making for later cooking. Most of the flavor and nutrition have been drained from them, but they still have a good amount of fiber and makes a good filler for some recipes. For example, you can mash them into mashed potatoes. (I will post a Tortilla Soup recipe tomorrow using the vegetables.)
        Bon appétit!

        Monday, September 13, 2010

        Veggie Chips - Trader Joe's

        These are my favorite chips from Trader Joe's. I love their crunchy texture... they remind me of the BBQ potato snack chips I grew up eating, very often. They have a very subtle yet flavorful taste and they are so light and airy, yet satisfying. And the natural red, yellow, green and potato colors are so appealing to the eyes.


        Lately, I've been experimenting with mixing chips and nuts as my snack. A veggie chips / almond combo was okay, but it's healthier and more satisfying than just eating a bunch of chips. (I like a 'sea salt and vinegar' chips / almond combo the best so far!) Hmmm, I should try mixing the veggie chips and kale chips...


        The trick I use to not over-eat snacks like chips is to pour them in a cereal bowl. If I have an entire bag of chips in my hands, I know I will eat more than I should...

        Sunday, September 12, 2010

        Healthy Living Fair

        I was at PCC's annual "healthy living" fair in Issaquah, WA earlier today. It was another cloudy September day in Seattle, but energy at the fair was great! There were about 100 vendors there to share information and hand out free samples of over 600 products. 


        You get a sense of wellness from the people when you go and meet those who've decided to be conscious about what they put in their body. I also appreciated the passion of the reps from the vendors who were there to hand out samples ans answer our questions. I tried so many interesting and yummy foods there that will make it on my next grocery list for sure. Look at all the free samples I got to take home too!


        The coupons they were handing out will be very handy as I incorporate some of the items into my future meals. I would like to thank all the vendors who were there!!


        I met several interesting people at the event as well. I met a couple who's been vegan for over 30 years and were there to promote a vegetarian life style. I got a book from them called 'Vegetarian Pacific Northwest - A Guide to Restaurants and Shopping'. It will be a great resource! I also met an MD who is passionate about educating his patients about the correlation between diet and health. He gave me a book recommendation, and I'm planning on checking it out later. I also chatted with a rep from 'Follow Your Heart' (the company who makes my favorite Vegenaise) and found out that they are working on soy-free products now!

        If you decided to visit my blog because of an encounter we had at the fair, please drop a comment, or write to me via Facebook, or Twitter@Veggiable. I would love to hear your feedback and stay in touch with you. It was nice meeting you!!!

        Saturday, September 11, 2010

        Giant Bakery Style Double Chocolate Chip Cookies - Vegan

        Have you ever heard chocolate chip cookies calling your name while giving your coffee order to the barista? Ever since I decided to go on an almost-vegan diet, their voices have gotten quieter and quieter. I just tell them that I'm a vegan (kind of true) and I can't eat them. It's empowering, but I still want some occasional chocolate chip cookies! Hence, the search for vegan chocolate chip cookie had begun. I found several recipes online but many of them had ingredients that I have never heard of, which means I'd have to go to a specialty store and they would probably be expensive. Then I found 'The Vegan Cookie Connoisseur'!!! Kelly Peloza, the creator of this recipe, explicitly says that "Making a batch of chocolate chip cookies shouldn’t involve running to five different health food stores searching for some elusive ingredient.” Yes, this is my kind of vegan baking! I found myself baking the following evening...


        What goes in your body (8-10 giant vegan cookies ) :
        • 1/2 cup chocolate chips (for melting)
        • 1/2 cup soy milk
        • 2/3 cup canola oil
        • 2 teaspoons vanilla
        • 1 1/3 cups sugar
        • 2 tablespoons cornstarch
        • 2 cups flour
        • 2/3 cup cocoa
        • 2 teaspoons baking powder
        • 1/4 teaspoon salt
        • 2/3 cup chocolate chip

        You are going to:
        1. Preheat oven to 350°F.
        2. Melt the chocolate chips with 1/3 cup of the soy milk in either a microwave or in a glass dish placed in a saucepan of boiling water (makeshift double-boiler).
        3. Pour the melted chocolate and soy milk into a large bowl, then add the rest of the soy milk, oil, vanilla, sugar, and cornstarch.
        4. Add in the flour (unsifted), cocoa, baking powder, and salt. Stir until thoroughly mixed, then add the chocolate chips. (Look at this rich chocolaty dough, and it's safe to eat!)

        5. Using your hands, grab handfuls of cookie dough and flatten them out to a little thicker than a 1/2″ on a cookie sheet lined with parchment paper. 
        6.  Bake for about 15 minutes (shorter if you made smaller cookies) or until the edges are very firm, and the centers look chewy and feel soft to the touch. Let them rest on the cookie sheet for a minute or so, then very carefully transfer to the cooling rack.
         Secrets from the chef:
        • When purchasing chocolate chips, read the ingredients carefully as some of them contain milk. 
        • Surprise your non-vegan friend with this yummy cookie! 
        I can't wait for her book 'The Vegan Cookie Connoisseur: Over 140 Simply Delicious Recipes That Treat the Eyes and Taste Buds' to come out in November. Perfect time for a Christmas gift! (Hint, hint...)

        Bon appétit!

        Friday, September 10, 2010

        Identity Crisis...?

        'Veggiable' have gained 18 'likes' on Facebook in two weeks! I post cool and informative articles, quick tips, thought-provoking quotes, good deals etc. If you haven't 'liked' it yet, you are missing out! Some of the deals I post are time sensitive, so you may want to get them right on your wall.

        Well, I'm still new to this healthy diet, blogging, facebooking, and tweeting stuff. Sometimes I wish I had a one-word explanation of what kind of eater I am, such as vegan, vegetarian, etc. Life seems much simpler that way... I eat mostly a plant-based diet, but I'm not a vegan because I eat fish, and I'm not really a pescatarian. I could call myself a flexitarian but I'm not all that flexible. (For more information on what I do and don't eat, please read posts in my "About Antidisestablishment Vegetarianism" section.)

        On the other hand, it's nice to be free from a label. There's a sense of freedom in not having to fit into a description created by someone else.

        Here is a quick glance of some common food-selection practices and ideologies. (Source: Experience Life Magazine)
        • Omnivore: eater of both plant- and animal-based foods
        • Flexitarian: mostly vegetarian; sometimes eats meat
        • Lacto-vegetarian: vegetarian who eats dairy products but doesn't eat eggs
        • Ovo-vegetarian: vegetarian who eats eggs but doesn't eat dairy products
        • Pescatarian: vegetarian who eats fish
        • Vegan: eats no meat, eggs or dairy, and no animal-derived ingredients like gelatin, honey or whey 
        • Raw-foodist: eater of unprocessed foods, that are not heated above 115 to 118F; often vegan
        • Locavore: prefers foods grown or produced in their own local neighborhood or region - often within a certain radius
        • Microbiotic: consumes unprocessed vegan foods, sometimes fish; generally avoids refined oils, flours and sugars
        • Kosher: abides by Jewish dietary laws; avoids pork, shell-fish and fish without scales; does not mix meat and dairy in same meal; eats only meat prepared by Kosher methods
        • Halal: abides by Islamic dietary laws and customs; avoids pork and alcohol, may avoid seafood or fish without scales; eats only meat prepared by Halal methods
        • Fruitarian: eats only fruits or foods that fall from plants, or that do not require the destruction of the plant for harvesting
        For someone like me, who is still new to eating a selective diet, it's very intriguing to know about the different choices people make for different reasons.

        What kind of eater are you?

        Thursday, September 9, 2010

        Wild Rice and Bean Patties - Vegan

        This recipe is very inexpensive and healthy, which for me are two of the most important criteria in choosing what to make for dinner. You can serve these patties as a main dish, or use them as patties for burgers to stretch your grocery money even further.


        What goes in your body (8 vegan patties) :
        • 1 canned garbanzo beans, drained and rinsed
        • 6 tbsp chopped cilantro
        • 3 green onions, chopped
        • 1 tbsp finely grated fresh ginger
        • 1 tbsp ground cumin
        • 1 tbsp ground coriander
        • 1/2 tsp ground turmeric
        • 1/2 cup wild rice blend
        • 1/3 cup whole wheat flour
        • vegetable oil for cooking
        • salt to taste
        You are going to:
        1. In a medium sauce pan, cook wild rice in 1 cup of water with a dash of salt about 45 minutes or until fully cooked, then cool. (This step can be done the previous day.)
        2. Into a food processor, place garbanzo beans, cilantro, green onions, ginger, cumin, ground coriander, and turmeric and process for 30 seconds or until the mixture resembles coarse breadcrumbs. 
        3. Transfer mixture to a large bowl, mix with rice and flour, then shape it into desired-sized patties. (Please keep in mind that they do not shrink when cooked, as meat patties do.)
        4. Heat oil in a non-stick pan, cook 3-4 minutes each side or until golden and heated through. 
        5. Serve with side of fresh greens and Karam's garlic sauce.
        Secrets from the chef:
        • Frying in a pan is only to add crispy texture and heat since everything in these patties can be eaten as they are. 
        • If you don't have Karam's garlic sauce and you are not vegan, serving them with sweet chili yogurt is a good option. To make sweet chili yogurt: mix 1 cup yogurt, 2 tbsp sweet chili sauce and 1 tbsp lime juice. 
        • I also accidentally found out they go well with balsamic vinegar (when the vinegar ran under the patties from my salad).  
        Bon appétit! 

        Wednesday, September 8, 2010

        Yakisoba - Vegan

        This is a Japanese noodle dish I grew up eating. My mother typically fixed it with thin slices of pork in it, but it's tasty enough that I can omit pork from it to make it vegan-friendly.


        Well, the first thing you have to do is to find a package of Yakisoba noodles. They look like Chinese egg noodles but they're different... they don't contain any eggs; they wheat noodles. You can find it in the refrigerated section of any oriental grocery stores or sometimes in regular grocery stores. If you go to oriental grocery stores, you'll see several varieties, but this is the one I typically see in regular grocery store (I bought this one from Fred Meyer). Most of the packages come with seasoning sauce. How convenient!

        What goes in your body (3-4 vegan servings) :
        • One package of Yakisoba noodles (This one contains three sets of noodles and seasoning packages each.)
        • 1/2 head of cabbage, cut into bite size pieces
        • 1 bag of bean sprouts
        • 1 bunch of green onions, sliced
        • 3 carrots, thinly sliced
        • Cooking oil 
        You are going to:
        1. In a large non-stick pan, heat a small amount of oil and cook carrots 2-3 minutes on medium heat.
        2. Add cabbage and cook 2-3 minutes, then add bean sprouts and cook another 2-3 minutes.
        3. Add Yakisoba noodle and stir fry for 2-3 minutes, loosening noodles as you fry. The moisture from the vegetables should help the noodles loosen, however, add a small amount of water if you find it hard to loosen the noodles. 
        4. Add sauce packets and green onions to the pan, and cook till the vegetables are tender and sauce is evenly mixed into the noodle mix. 
        Secrets from the chef:
        • Tongs tend to break the noodles into small pieces, I found it much easier to use a pair of chopsticks to separate the noodles. The longer chopsticks designed for cooking can be purchased at oriental stores. (Regular chopsticks would work, but be careful not to burn your hand!) 
        • You can use soybean sprouts (available at oriental grocery stores) instead of regular bean sprouts for more protein. 
        • For your non-vegan friends, you can cook meat separately with a small amount of seasoning from the packet and add it to their plate. (This one has chicken.)

        Bon appétit!  

        Tuesday, September 7, 2010

        Kale Chips - Vegan

        Kale is one of my favorite vegetables. I like its flavor and the fact that it doesn't get soggy like spinach when cooked. My friend sent me a link to a recipe for 'kale chips'. I was intrigued... chips from leafy green veggie? I had to try. They were very crispy and delicious! Needless to say, I ate a entire bunch of kale in one sitting... it's all good, right?

        What goes in your body (vegan) :
        • 4 cups kale (1 large bunch)
        • 1 tbs. extra-virgin olive oil
        • 1 tsp. sea salt
        You are going to:
        1. Preheat oven to 375F. Line a baking sheet with parchment paper.
        2. Wash kale, remove stem, and slice into manageable-size pieces.
        3. Toss pieces in a bowl with olive oil until coated, then arrange in a single layer on a baking sheet.

        4. Roast for 5 minutes, then turn carefully with metal tongs and roast another 7 to 10 minutes until kale begins turning brown, crisp and brittle.  Remove from oven and sprinkle with sea salt.
        Secrets from the chef:
        • The original recipe and other great information about kale can be found on 'Experience Life'. 
        • Once you turn them, check frequently so that they don't get overcooked. You want them to be just crispy enough. I used fairly young kale from my garden and the cooking time was much shorter than the recipe above.
        • I found it very difficult to grab kale with my metal tongs without tearing them. It was much easier to use a pair of chopsticks for this job. 
        Bon appétit!